While assisting my 5-year-old daughter in cleaning up her desk recently, I discovered a sizable stash of pink finger-knitted threads in the corner of a drawer. She proudly told me that she handmade those “necklaces” to give away as gifts.
It was both an “Awww” and “Ummm” moment for me. Of course I did not have the heart to suggest throwing them away, but I knew that those were not very practical necklaces, and I’m not sure if she had so many friends to whom she could give them.
Suddenly, I had an idea. “How about we make them into gifts for your teachers?” Teacher Appreciation Week was coming up, and she was also about to graduate from preschool. She had six teachers to use up the stash.
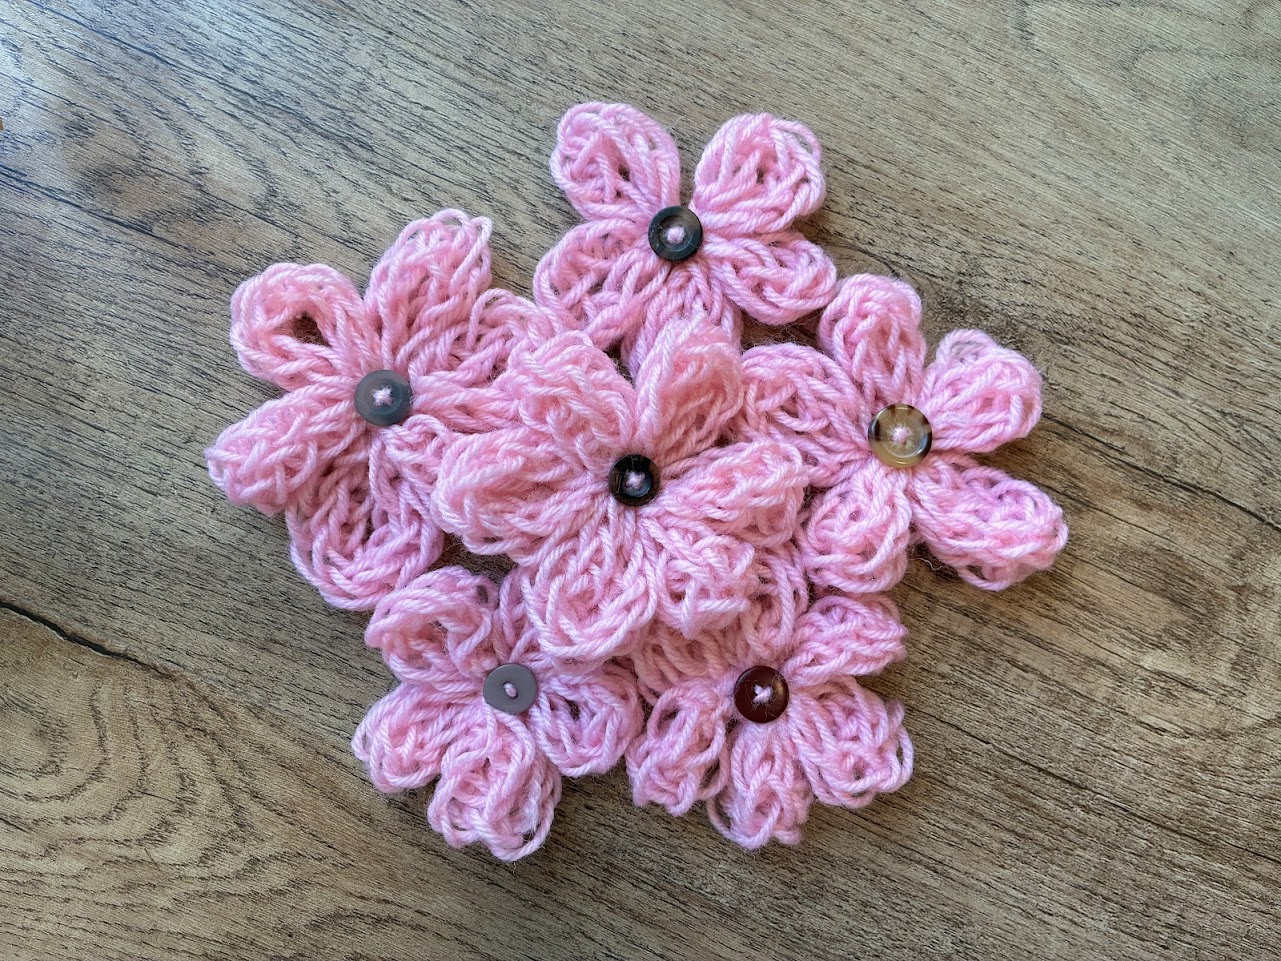
After much head-scratching and web-searching on my end, I finally came up with a way to make these finger-knitted threads into something more useful: Flowers! With safety pins attached, these are great for wearing on clothes and bags, making them the perfect kid-made gift for Teacher Appreciation, Mother’s Day, and more.
My daughter did the finger-knitting, but I did all the flower-making part as it was a bit more complicated. Nevertheless, my daughter was excited to see her finger-knitted work transformed, and even happier to see her caring, encouraging teachers put them on immediately upon receiving them!
And as for me– I’m grateful to have reclaimed that corner of her desk drawer.
Finger-Knitted Flowers

Materials:
- #4 acrylic yarn, pink (or color of your choice)
- Button
- Safety pin
- Wire needle threader or hot glue gun (for attaching button to yarn)
- Crochet hook or tapestry needle (for weaving in the ends)
- Scissors
Instructions:
Step 1: Finger knit. With 4 fingers, finger-knit a long thread of desired length, roughly 36 inches for a flower with 5-6 petals. Leave at least 6 inches of loose yarn on both ends.
Step 2: Prepare the flower (Figure 1). Arrange finger-knitted thread in an S-shape with 5-6 bends, with both ends aligned in the middle. Each bend will become a petal.
Step 3: Secure the flower (Figures 2-4). With the thumb and index finger of your left hand, gather the ends and the middle of the bends. With your right hand, wrap one of the loose yarn tightly around the gathered middle for 2-3 times. Wrap the other loose yarn tightly in the opposite direction 2-3 times. (Figures 2-4)
Step 4: Attach the button to the front (Figure 5). Tie a knot in the back. Using a wire needle threader, attach the button to the loose yarn and center it on the front of the flower. Wrap the loose yarn tails tightly another 1-2 times. (If using a hot glue gun, skip this step and just attach the button at the end.)
Step 5: Attach the safety pin to the back. Thread the loose yarn tails through the safety pin, with the fixed (non-opening) side on the back of the flower. Tie a knot to secure the fixed (non-opening) arm of the safety pin to the back of the flower.
Step 6: Hide loose ends (Figure 6). Using a crochet hook or tapestry needle, pull the loose ends one a Insert a crochet hook from the tip of a petal all the way through to the center of the flower. Pull the loose end inside the petal to hide it. Trim loose ends shorter if needed.